


I really really love these pants but sadly the instructions are only in German and the photo tutorial on the Farbenmix site is not too hot - even if you use google translate! I decided to make a sew-a-long so that anyone English out there has a much better chance at succeeding with these pants. I'm going to include all the little tips and tricks I have learned about how to make awesome pants for your little one:)
There are quite a few steps so stick with me, you'll be glad you did when you get to the end!
So here goes....
Picking a size:
First of all you need to decide on a size. I like to compare the actually pattern pieces to a pair of RTW pants (or possibly another pattern that you have) just to make sure you get the right sizing. I find the Pitt pattern to be slightly baggy (a look I love!), keep this in mind. You won't need to a zipper fly unless your little one is a little on the fluffy side. This tutorial does not use a zipper fly, I will do that another day.
You can always adjust the length of the inseam by adding to the pattern.
Materials:
1 1/2" elastic, 1" less then the exact waist of your child
kid's glue stick (for holding seams down)
Fabric for your pants (possibly more than one type if you want a mixed look)
Fabric for lining the pockets
twill tape, embroidery,...embellishments... (optional)
Sewing machine
coordinating thread
serger (optional)
scissors, needles, ....
Tracing:
Here are the English translations for the different pattern pieces:
Some are direct translations, some are what I think they should be called.
1) pants front, top - cut two of pants fabric
2) pants front, center (knee patches) - cut two of pants fabric
3) pants front, bottom- cut two of pants fabric
4) pants back, side pieces- cut two of pants fabric
5) pants back, top- cut two of pants fabric
6) pants back, bottom- cut two of pants fabric
7) back of front pocket- cut two of pants fabric
8) front pocket facing- cut two of lining
9) back pocket - cut two of pants fabric, two of lining
10) side pocket (ruler pocket) - cut one of pants fabric
11) belt loop - DO NOT ADD SEAM ALLOWANCE - cut 5 of pants fabric or cut one 20"x 2" strip and cut into five after sewn
12) Fly sheild (not necessary for a faux fly) - cut one of pants fabric
13) waistband - cut one on the fold of pants fabric (if you are adding a real fly you will have to extend this piece for the overlap at the button)
Next you need to trace off your pattern onto something. I like to use 4 mil or 6 mil plastic painting tarp from Home Depot. You can get it in the paint department. It is thick and durable and you can easily see through it. I used sharpies to trace the lines and large nuts (also from HD) to hold it all down.
You are also going to want to label each pattern piece and right on it where the top and bottom or center front/center back is on it so you don't get confused. Transfer all markings to the pattern pieces as well. Make sure when you transfer the markings for the knee patches that you make a right and left patch with darts that mirror each other.
Adding a seam allowance:
This pattern does not include a seam allowance. You can add a seam allowance to straight seams with a clear ruler and for curved seams you can mark off 1/2" (or whatever your sa is) every 1" (or so) on the curve and then connect the dots afterwards. You will need to have your dots closer together the more tight the curve.
I really like using a 1/2" seam allowance, you'll want to add something more that 1/4" because when we do our double top-stitiching you'll want to catch the seam with the second row of stitches and you won't be able to do that if you only have 1/4" to work with.
I only added 1/4" seam allowance to the top of the pants (both the front and back pieces and the waistband since I don't need all that bulk in the waistband and there is no double top-stitching there. I also added only 1/4" sa to the back pockets because the seam is hidden (they are turned and top-stitched) and I would only have to cut off the sa when triming the raw edges for turning. (If this is confusing just add 1/2" to everything and trim later!) I also added only 1/4" sa to the bottom of the ruler pocket. The hem allowance at the top of the ruler pocket is already included in the pattern.
Don't add a seam allowance to the belt loop piece.

Cutting the fabric:
Choose which fabric you will be using for the different pattern pieces and make sure the fabric is pre-washed and ironed. You need at least two of most pieces so fold the fabric in half, right sides together, and arrange the pattern pieces so they take up the least amount of fabric. Hold the pattern pieces down with the nuts from before and then trace around with a fabric marker. Remove the plastic pattern pieces and cut out your fabric pattern pieces. Transfer all markings to each pattern piece. The darts on the knee patches and the faux fly markings will need to go on the wrong side of the fabric and the pocket markings will need to go on the right side of the fabric.
Add embelishments:
If you are going to add any embroidery or ribbons/twill tape add it now. It is easier to add when nothing is sewn together because there is less bulk to deal with and all the edges of the embelishments will get sewn down nicely when you sew everything together.
I added embroidery just below the front pockets and on the back pocket. I also added twill tape to the bottom leg. You can do anything and everything! Don't hesitate to mix and match colors, textures and prints. I find the more you do the more awesome it looks!
Preparing to sew:
You'll want to pick a thread color for top-stitching and a thread color for serging so that you don't have to switch your threads around all the time. I usually pick the serger thread to match the pants fabric and the top-stitching to contrast the pants fabric and match some of the embroidery. If you really want the top-stitching thread to stand out run two threads of the same color through the machine (or use top-stitching thread). I usually match the bobbin thread to the top-stitching thread. If you are not using a serger then you will just be finishing the raw edges with your sewing machine and this will already be threaded with the top-stitching color:)
Sewing instructions:
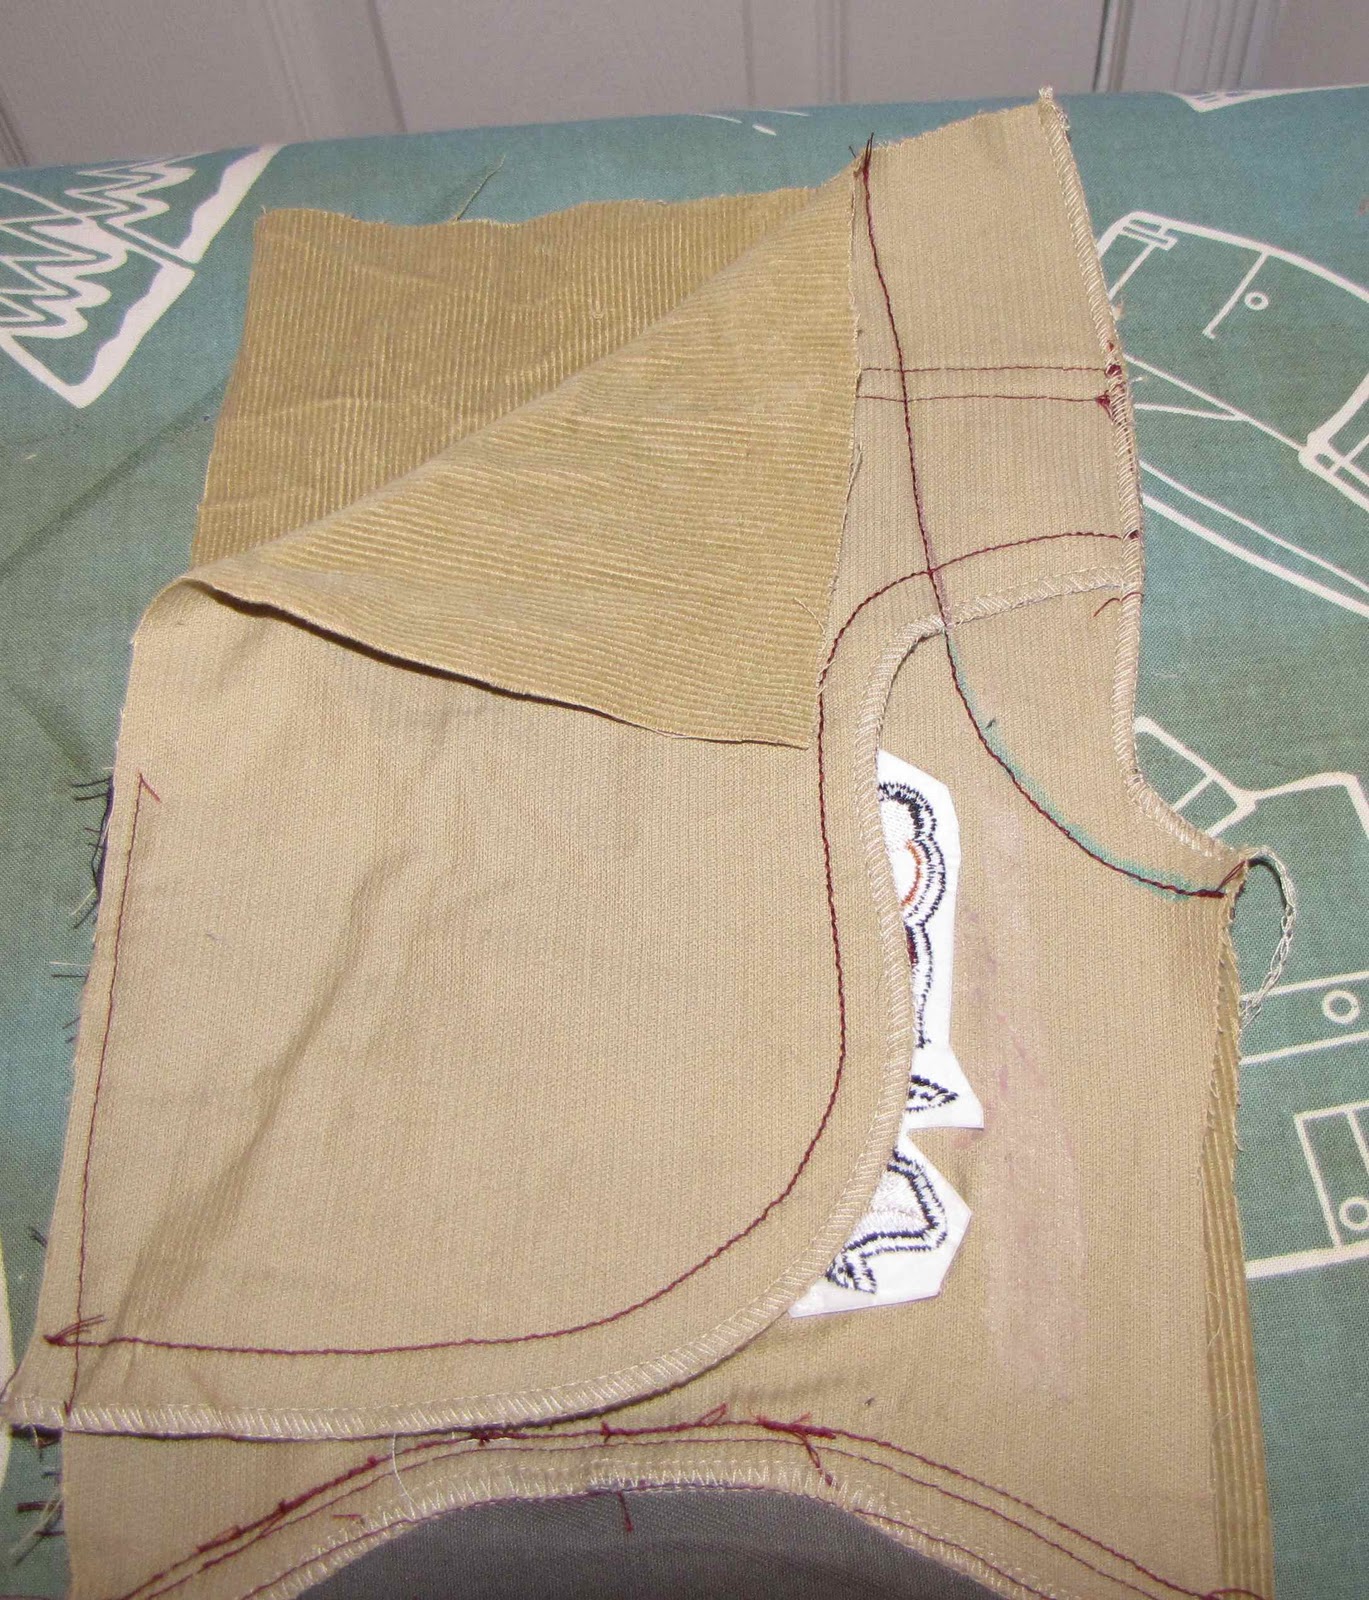
1) Place pants front, top (#1) and and front pocket facing (#8) right sides together and sew the top and diagonal seams. Trim down to 1/4" and grade seams. (Grading means cutting the lining fabric 1/8" shorter then the pants fabric all along the seam allowance so that when you turn right side out the lining curves under the pants fabric and you don't see the lining.)

Note: You want to stop at the corner because you'll want to sew the top horizontal part to the back of front pocket (#7) in the following steps. You want to finish your top-stitching so that when you sew the horizontal seam the sewing lines meet up and it looks like one continuous seam. Don't forget to back tack to secure your seams.


At the sides of the pants, baste 1/8" from the raw edges to secure the pocket and pants pieces together.
You will want to add a bar tack (see the faux fly section for info on that) where the two seams meet. This will strengthen the pocket opening for when your little one puts his or her hands in and out. I'm not going to do this because I'm going to use rivets which I will add at the end.

Again, before you sew the darts make sure that you have right and left knee patches with darts that mirror each other.

Top-stitch the darts down, sewing from the raw edges to the point, back tack at the point. Just do one line of top-stitching.


With your glue stick fold and secure one of the raw edges down all the way around. (Don't skip this, it makes it easier to sew the waistband down in the end).


Sew the hem from the right side of the pants. Sew on the inside of the cuff as you did with the waistband.


35) Now for the belt loops. The pattern has you cutting out each belt loop separately - you can do this if you want but it is much faster to cut one long strip, sew it together and then cut it into the proper length pieces. So cut one long strip that is 20" x 2", finish one long raw edge.
I only had scraps to work with so I had to do a bit of both!


Cut into 5 equal pieces (4 inches each).
If you choose to do the belt loops individually you just do the same but for each piece individually.

You will want to have one belt loop right on the middle back seam, two belt loops 1" to the outside of the bar tack on the front pockets and two belt loops on the back 1 1/2" from the side seams. These are just estimate measurements, I was making the size 98/104 so if you are making a different size you might need something different.

Congrats! You are done! Enjoy your Farbenmix Pitt pants!!


